개요
pytest101을 이어서 pytest201 강의를 정리하도록 하겠다.
pytest101에서 사용한 코드를 계속 사용할 예정이라서 pytest101를 보고 오면 좋을 거 같다.
다수의 케이스에 대한 테스트
from calculator import Calculator

calculator = Calculator()

def test_add():
    for i in range(10):
        assert calculator.add(i, 2) == i + 2
이렇게 인자가 적고 테스트할 경우가 확실한 경우 반복문으로 테스트를 할 수 있다.
하지만 인자가 많고 테스트할 경우가 많으면 어떻게 해야할까?
방법은 pytest.mark.parametrize이라는 데코레이터를 이용하여 테스트 코드에 파라미터 다수의 인자를 전달할 수 있다.
import pytest
from calculator import Calculator

calculator = Calculator()

@pytest.mark.parametrize('x, y, result', [
    (1, 3, 4),
    (2, 3, 5),
    (3, 3, 6),
    (4, 3, 7),
])
def test_add(x, y, result):
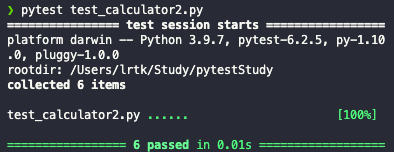
      assert calculator.add(x, y) == result
위 코드처럼 테스트 함수에 들어갈 인자와 테스트 함수의 결과를 pytest.mark.parametrize 데코레이터에 정의하면 간편하게 다수의 케이스를 테스트 할 수 있다.
import pytest
from calculator import Calculator, CalculatorError

calculator = Calculator()

class TestAdd:
    @pytest.mark.parametrize('x, y, result', [
        (1, 3, 4),
        (2, 3, 5),
        (3, 3, 6),
        (4, 3, 7),
    ])
    def test_add_parametrize(self, x, y, result):
        assert calculator.add(x, y) == result

    def test_error(self):
        with pytest.raises(CalculatorError):
            calculator.add('99', 1)
또한 예제에서 안 맞지만, Class로 그룹화를 시킬 수 있다.
pytest의 fixture 사용하기
fixture는 테스트를 위한 데이터 셋업과 데이터 클리닝이 반복적, 독립적으로 사용될 때 이용된다.
- 테스트를 위한 특정 파일과 디렉토리를 만들고 테스트 종료 시 해당 파일과 디렉토리를 삭제한다.
- DB를 연결하고 테스트 종료 시 DB 연결을 정상적으로 종료한다.
일단 어떻게 사용하는지 알아보도록 하겠다.
# conftest.py
import pytest

@pytest.fixture
def my_fixture():
    return 42
이와 같이 my_fixture라는 함수를 선언 후 반환값으로 42을 넘겨주도록 하였다.
import pytest
from calculator import Calculator, CalculatorError

calculator = Calculator()

class TestAdd:
    @pytest.mark.parametrize('x, y, result', [
        (1, 3, 4),
        (2, 3, 5),
        (3, 3, 6),
        (4, 3, 7),
    ])
    def test_add_parametrize(self, x, y, result):
        assert calculator.add(x, y) == result

    def test_error(self):
        with pytest.raises(CalculatorError):
            calculator.add('99', 1)

def test_fixture(my_fixture):
    assert my_fixture == 42
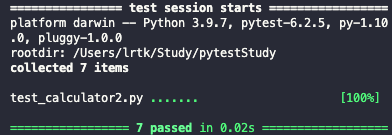
신기하게 conftest.py를 import 하지 않아도 my_fixture 함수의 반환값을 가져오는 것을 확인 할 수 있다.
출력 결과 테스트하기
import pytest
from calculator import Calculator, CalculatorError

calculator = Calculator()

class TestAdd:
    @pytest.mark.parametrize('x, y, result', [
        (1, 3, 4),
        (2, 3, 5),
        (3, 3, 6),
        (4, 3, 7),
    ])
    def test_add_parametrize(self, x, y, result):
        assert calculator.add(x, y) == result

    def test_error(self):
        with pytest.raises(CalculatorError):
            calculator.add('99', 1)

def test_fixture(my_fixture):
    assert my_fixture == 42

def test_capsys(capsys):
    print('Hello')
    out, err = capsys.readouterr()
    assert "Hello\n" == out
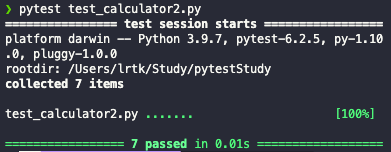
pytest는 테스트에 의해 stdout에 출력된 내용을 정기적으로 전달 받는다.
이를 cspsys 픽스처를 사용하면 stdout에 출력된 내용을 검사를 할 수 있다.
def test_capsys(capsys):
    print('Hello')
    print('bye')
    out, err = capsys.readouterr()
    assert "Hello\nbye\n" == out
만약 테스트에서 여러 출력이 나온다면 위와 같이 하나의 문자열에 넣어서 감사해야한다.
'Development > 내용 정리' 카테고리의 다른 글
| [pytest] 02. pytest101 (0) | 2021.10.06 |
|---|---|
| [pytest] 01. 시작하기 (0) | 2021.10.04 |

Comment